User Manual Power Expenses - Basic
Power Expenses Desktop
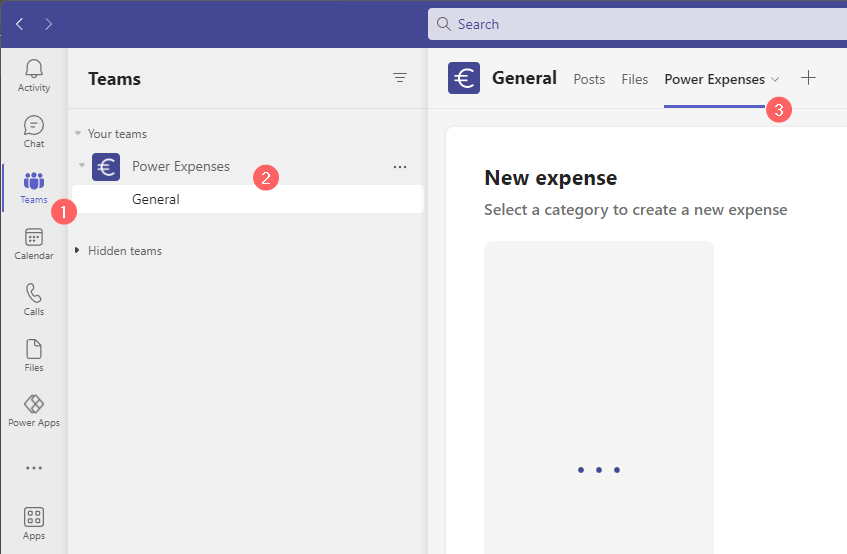
The dekstop version is accessed through the Microsoft Teams application by navigating to the Team in which Power Expenses is intalled. If the name for the team is for example ‘Power Expenses’:
Navigate to ‘Teams’
Select the Team ‘Power Expenses’
Click on the Tab with the name ‘Power Expenses’
If you are a Member of the Team the Power Expenses Dashboard is shown. When the app isn’t loading because you have no access, please read the chapter about the Power Expenses app and User Rights.
Note
Members with Owner rights within the Team is shown the Approval screen instead of the Dashboard screen when opening the app.
Dashboard screen overview
The screenshot below shows the Dashboard. This will be the first screen a regular user (Member) will see when the app is opened.
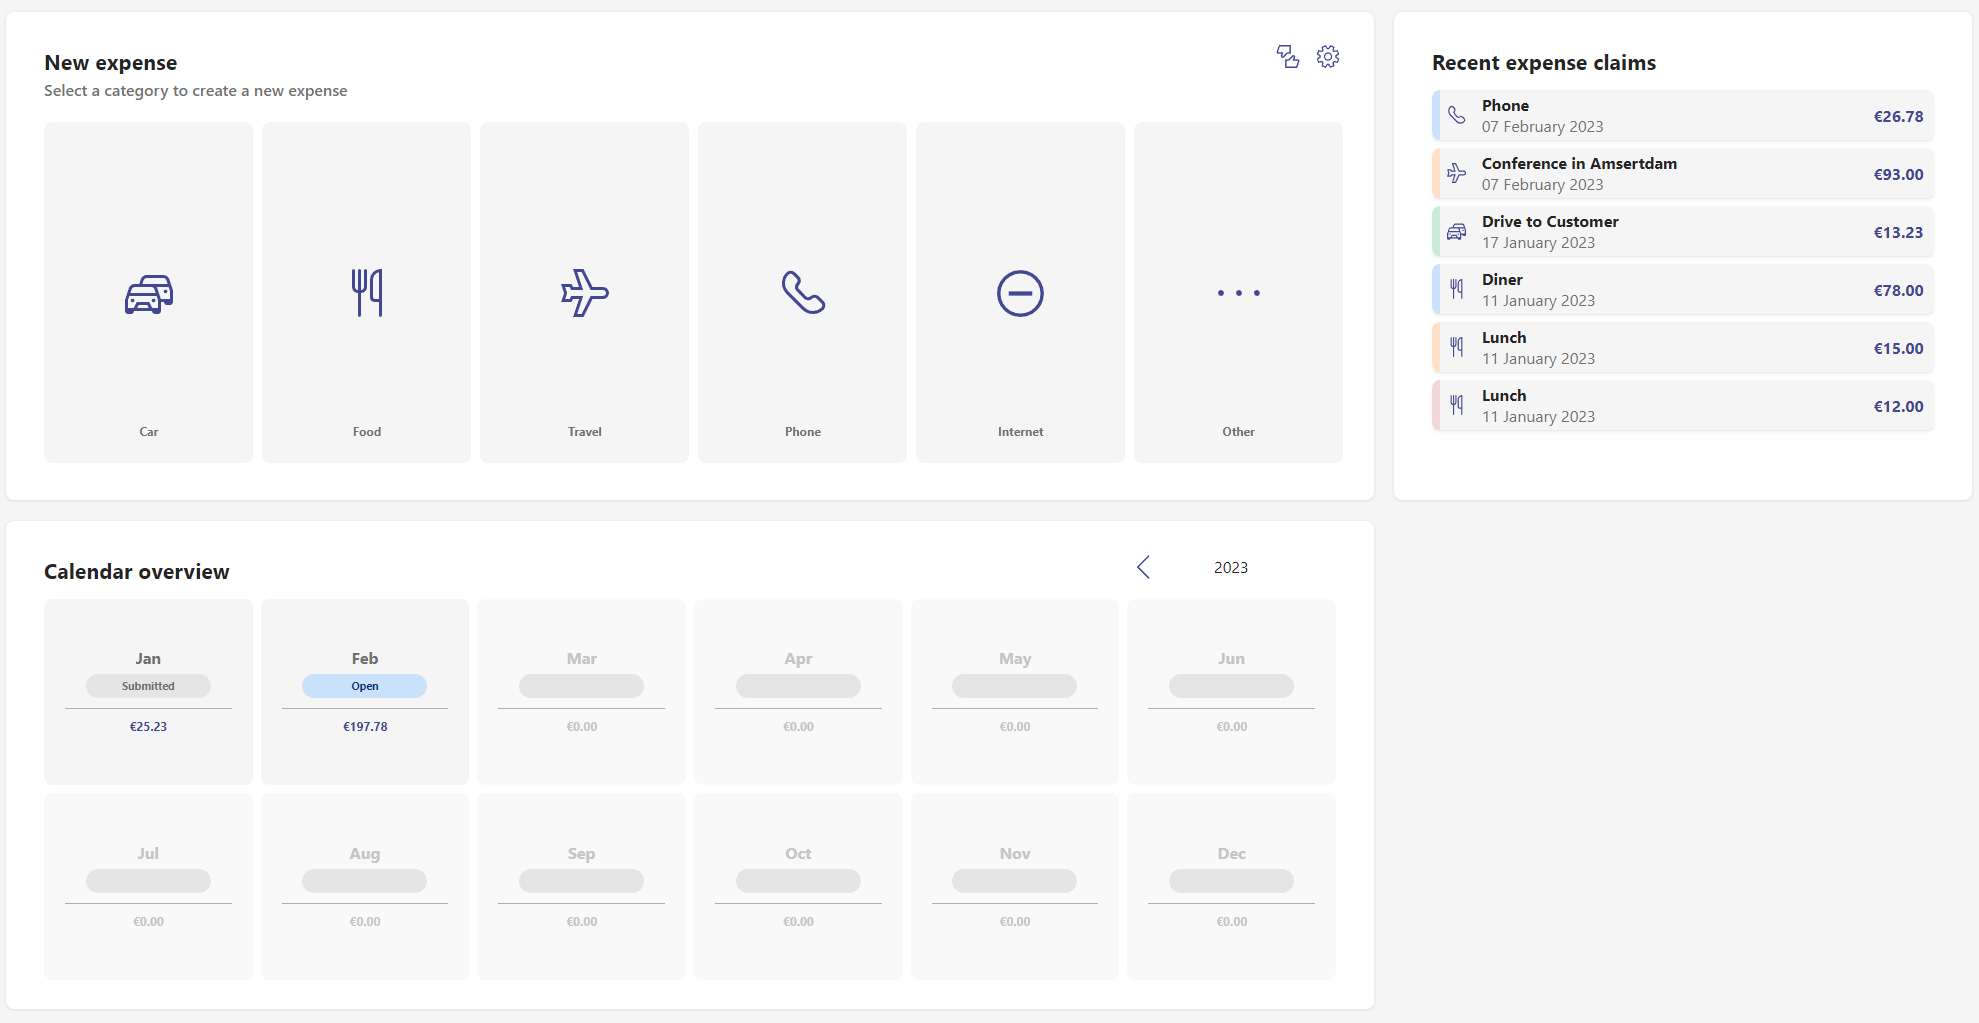
The Dashboard is divided into three sections:
New expense
In this section several predefined categories are presented. To submit a new expense claim you can click on a corresponding category. The categories are sorted from the most used to the least used. Users can also edit their personal settings by clicking on the cog-icon. When a user has Owner rights, the approvals-icon (thumbs up and down) is also visble. Clicking on this icon will navigate the user to the Approvals Overview screen.
Recent expense claims
This is a list with the most recent expense claims and their status. The status of an expense claim is indicated with a color:
 Saved expense but not yet submitted. It can be editted, deleted or submitted for approval.
 Expense is submitted for approval.
 Expense claim has been approved.
 Expense claim has been declined.
 Expense claim needs some rework. You can edit and re-submit, or delete the expense.
Calendar overview
This section shows the months within the selected year. Default, the current year is shown. You can cycle through the years by using the ‘<’ and ‘>’ arrows. Every month shows the sum of reimbursable expenses with an invoice date of that month. Each month represents a Expense Set that can have a certain statuses:
 No expenses has been added to this month.
 In this month there is currently an open expense set in which new expenses can be added, edited or deleted.
 The expenses within this month are al submitted and processed. There are no open sets in this month.
There is an expense set subbmitted for review.
Create Expense Claim
In order to submit a new expense claim you click on the desired category in the New expense section of your dashboard. The next screen is a form in which you can enter your expense claim details. Depending on the category several input fields are shown. These input fields can be configured per category by a user with Owner permissions.
Note
In the following examples all field labels are configurable too (except for the description). So the labels in this screenshot might not be the same as in your Power Expenses app.
Example 1 - Category ‘Food’
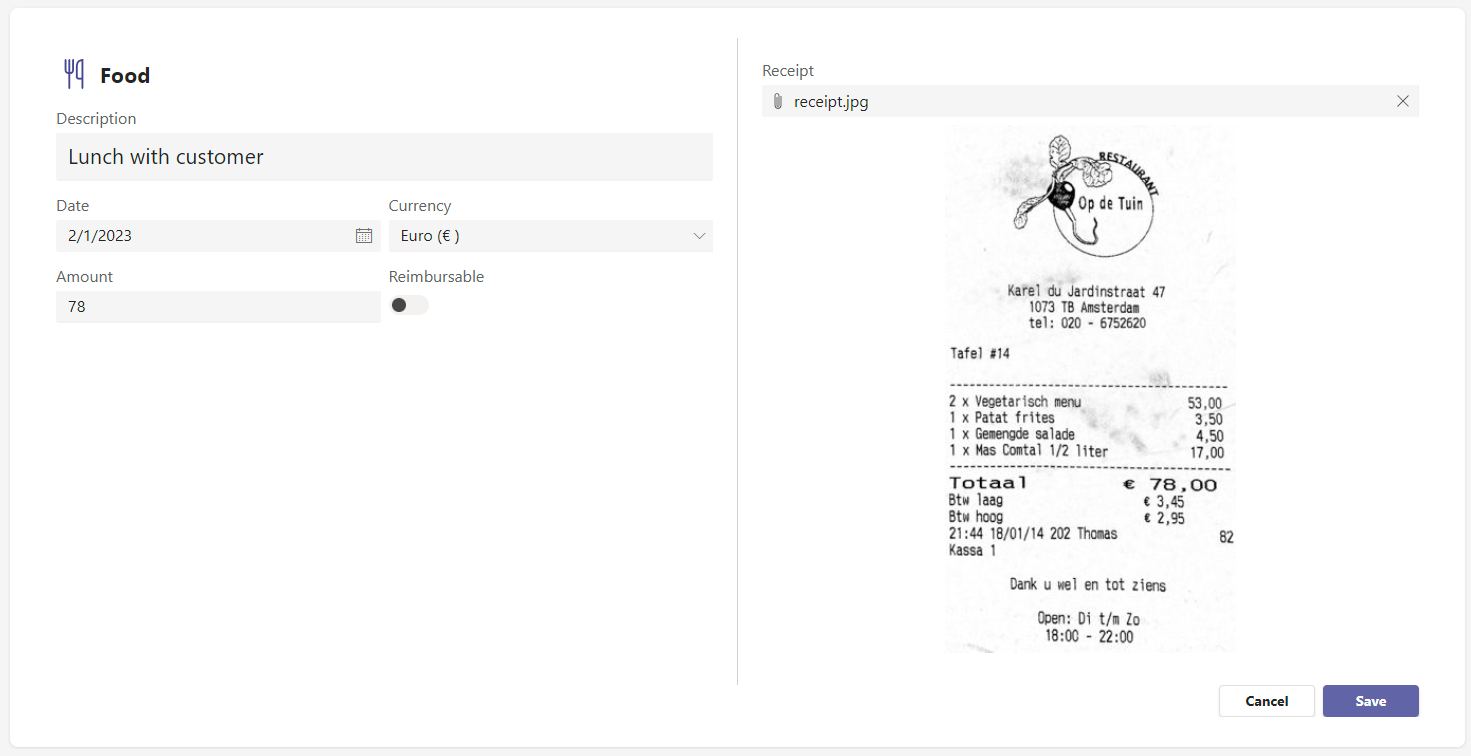
In the example above the ‘Food’ category is choosen. For this category the following fields are configured:
Field |
Explanation |
|---|---|
Description |
Give a short description of your expense |
Date |
The date of your receipt |
Currency |
The currency used on you receipt |
Amount |
The total amount the receipt or invoice |
Reimbursable |
Give up if this expense claim is reimbursable or not |
Receipt |
Click on this field to upload an image of your receipt |
Click on Save to save this expense claim. This expense claim will be saved in a new or existing set in the month february of the year 2023. Click on Cancel to stop creating a new expense claim. You will be prompted if you’re sure about this before you head back to the dashboard.
Example 2 - Category ‘Car’

In the example above the ‘Car’ category is choosen. For this category the following fields are configured:
Field |
Explanation |
|---|---|
Description |
Give a short description of your expense |
Date |
The date of your travel day |
Distance (Km) |
Distance travelled in Kilometers |
Amount |
A read-only field with the automatically calculated amount that will be refunded |
Click on Save to save this expense claim. This expense claim will be saved in a new or existing set in the month february of the year 2023. Click on Cancel to stop creating a new expense claim. You will be prompted if you’re sure about this before you head back to the dashboard.
Edit Expense Claim
It is possible to edit expense claims that are not yet submitted. Expense claims that have the status Draft or Rework can be editted. You can do this by opening an expense claim from the recent expense claims list or by selecting one is a specific set from the calendar overview. When you’re done editting press the Save button to save your changes.
Delete Expense Claim
It is possible to delete expense claims that are not yet submitted. Expense claims that have the status Draft or Rework can be deleted. You can do this by opening an expense claim from the recent expense claims list or by selecting one is a specific set from the calendar overview. When you opened an expense claim press the Delete button. You will be prompted if you’re sure about this. Press Yes to confirm.
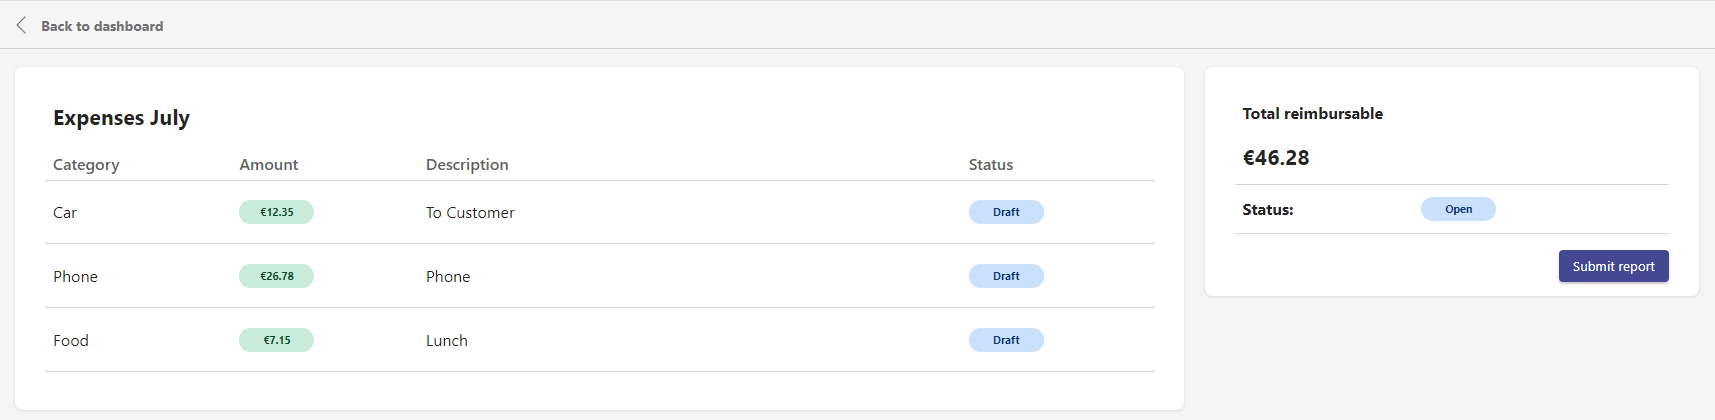
Submit Expense Set
You can submit an Expense Set for approval by opening a set from calendar overview. Press on Submit Report to submit all items that have the satus Draft. You will be prompted if you are sure to submit the expense claims. Press Yes to confirm. Items with the status Approved or Declined will not be send for approval again. If there is an item with the status Rework you cannot submit the set. You should first change this expense claim before you’re able to submit the set again. The status of the sent items will change to Review. Als the status of de Expense Claim Set will change to Review.